8/13/14
I decided it was time to try something more challenging. So I ordered a couple of flasks of Ghost Orchids ( Dendrophylax lindeii ) on eBay.
The flasks arrived in a few days, everything looks wonderful.
I did have to break the flasks to remove the plants, not a big deal, wrap the flask in a towel and use a hammer.
After removing the orchids, I dropped them into a container of water with fertilizer and rooting hormone while I gently untangled them and removed the agar.
So far so good.
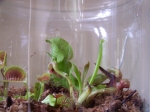
They are currently dispersed across 4 terrariums, worm castings on the bottom, sphagnum moss, then mulch, orchids are resting on the mulch.
For now I’ll keep the light levels low. The largest trick is to keep the humidity close to 100% and keep mold and fungus from killing the seedlings.
I use a light dose of fertilizer with rooting hormone to water my orchids, these included.
8/18/14
I’ve lost two of the ghost orchids to fungus, I’ve dispersed a few that didn’t look good into the carnivorous terrariums.
About a half dozen have grown their baby leaves, these two leaves are temporary and will fall off once the plants get settled.
Sept 12, 14
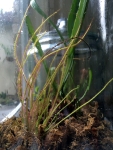
I admit to slaughtering most of the ghost orchids, of the half dozen to a dozen remaining most are showing new growth. They are in a large southwest facing window, in a not tightly sealed terrarium and I’m spraying them with water in the morning and evening.
Oct 6, 2014
These are tough, every time they start doing well, they start doing poorly a week later. I moved them from the southwest window to a spot under a bright LED which doesn’t get as hot in the afternoon. We’ll see how that goes?
Feb 2015
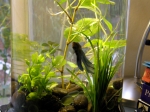
I killed all but one of the Ghost Orchids. The surviving one is floating on a piece of bark in a fish tank under an extremely bright light. So far it seems to be surviving.
Of all the carnivorous plants I grow these are some of the more challenging. For easy carnivorous plants, try a pitcher plant.
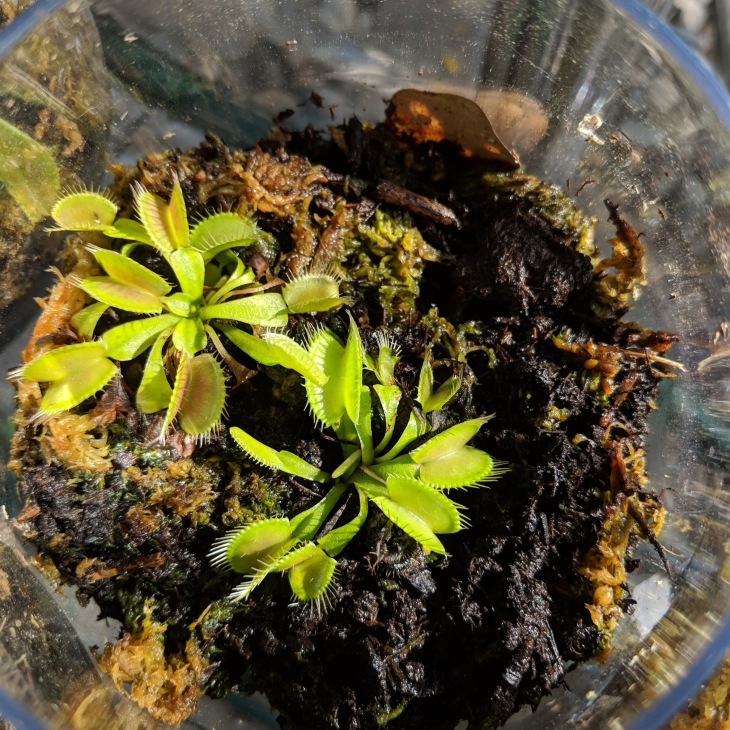
Flytraps do very well in terrariums. Any clear covered glass container will work. If you grow them on a windowsill be careful not to cook them in bright sunlight. I take the covers off the terrariums in the summer months.
Fill the bottom with soil that does not have any fertilizer and sphagnum peat moss. A 50/50 combination of sand/peat works well. Soak the soil and wring it out. It should be damp not soaking. Place your flytraps in there, put the cover on, put them under a bright light. They will thrive.
The only other way I have been successful with flytraps is to put them in a clay pot with a soil and peat moss mixture. Put the clay pot in a dish with about an 1″ of water. Water from the bottom, just top off the water every morning.
Fly traps grow slowly. You’ll need to be patient. When they are happy and large enough they will give you really cool flowers in the late spring. They rarely get beyond 8″ in height, most will max out at 5″. The flowers are white and will grow on long stems far above the height of the leaves.
A drafty window is best. Flytraps usually hibernate over the winter. I’ve found the the temperature change near the window is enough to send them into dormancy and wake them each spring. During the winter, keep the flytraps a bit drier.
I’ve found the most important thing for success is high humidity, it is more important than the amount of sun ( which should be as high as you can get)
Deadhead the old traps to encourage new growth. If a trap turns black, remove that leaf.
Do not feed your plants fertilized water or hard water. They will turn black and will die. I use distilled water.
I do not feed mine, I find they fend quite well for themselves.
They hate to be transplanted. (them and every other plant you ever read about) Since there is no danger of over watering them go ahead and put them in a decent sized pot to start with.
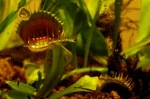
There are usually three trigger hairs on each side of the trap, sometimes more. You will have to look closely and catch the light just right to see them. There are also digestive glands on the traps inner surface which release enzymes to dissolve the bugs and to take up the nutrients. These are the red area of the trap. In the outer green edges of the trap are glands that release nectar to attract insects. This part of the trap reflects ultraviolet light that most insects can see.
The trap closes when two or more of the trigger hairs is bent over by an insect in less than a half minute or so. At the base of each trigger hair is a cell that allows the trigger to bend over, it acts like a spring. The upper part of the trigger hair is stiff and unbendable.
The trap rapidly closes when triggered, but leaves small air gaps. Smaller insects escape through these gaps. If a larger insect is inside and it can not escape through the gaps, the trap slowly closes the rest of the way. This is triggered by continuing movement of the trigger hairs or if the prey insect urinates or defecates.
The fully closed trap fills with acidic liquid released by digestive glands. Digestion takes time depending on the size of the insect. Digestion could take as long as a month. The trap reopens once all nutrients have been absorbed. The exoskeleton of the insect remains, waiting to be blown off by wind or washed off by rain. During this time the trap will not re-trigger.
These plants are native to bogs in North and South Carolina which is the only place they are known to grow in the wild. Temperatures there range from ~20’F to 100’F. I tried some outdoors but they couldn’t handle the summers of Houston or the winters of Boston.
Do not buy wild plants. They are endangered. Buy from reputable dealers. A lack of fires to clean out surrounding vegetation, and increased fertilizer runoff has damaged most of the remaining habitats of these plants.
These plants were a favorite of Charles Darwin who considered them to be one of the most wonderful plants in the world. Carl Linnaeus spoke of them as a miracle of nature. John Ellis was the first to describe the flytrap during his travels to the new world. Upon his arrival home there were lines of people waiting to obtain this plant, much like the iPhone lines of recent.
Aphids, mealy bugs, scale and thrips can all be a problem for fly traps. Orthene or some other systematic insecticide is best. Follow the directions on the label. Do not use soap based insecticides.
Black spot and other fungus can also be trouble. Captan is the favorite fungicide right now. You should be able to find it at any plant supply store.
Propagation by seed: I purchased seeds on eBay, get the freshest ones you can. I started mine on peat moss, don’t bury the seeds. They are on a southwest facing windowsill. The room varies from about 100’F in the afternoon to a low of about 70’F at night. I spray them twice a day with distilled water, or cover the container to keep them moist but not wet. One month old seedlings
1 year old seedlingsFlytraps, 2 yr old seedlings
Propagation by division: Take an outer leaf and gently pull down, you want to get as much of the white area at the bottom of the leaf as you can, that’s where it’ll root. Place the leaf in a terrarium, morning sun, moss, lots of distilled water and you’ll see roots in about a week. You want enough water to keep the terrarium walls clouded up but no water sitting at the bottom. I’ve not yet succeeded at this.
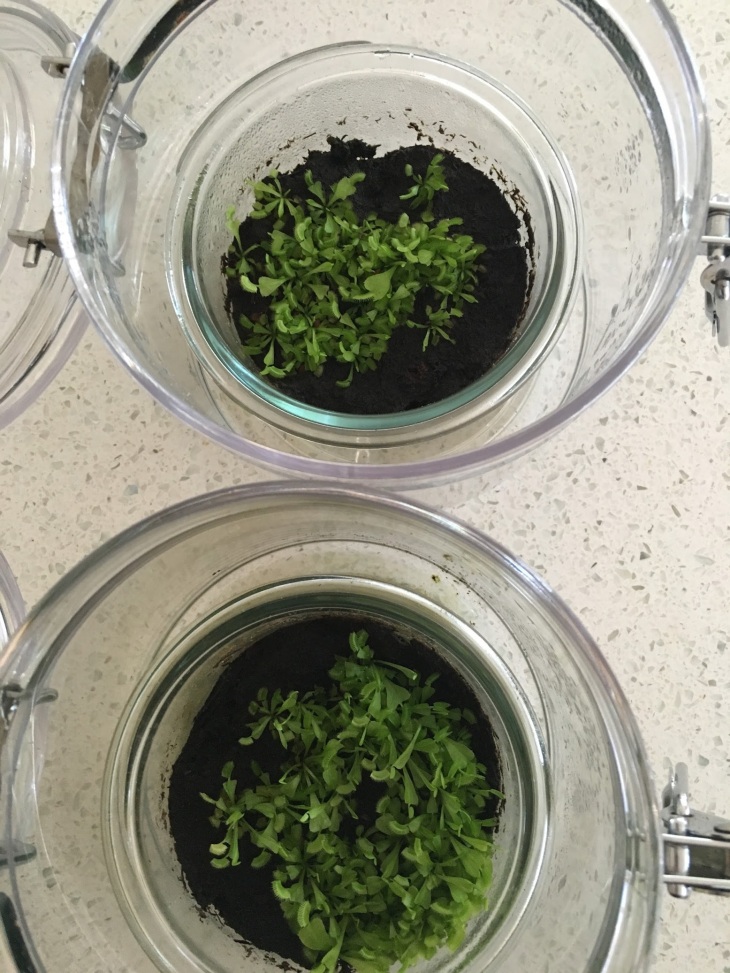
I missed my carnivorous plant terrariums and started a new batch this week. The plants haven’t had time to settle in yet, they’ll look even better in a few months.
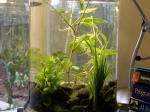
I haven’t the time or place to put a full terrarium. The micro sized ones I saw at the flower show have me experimenting with little ones this month.
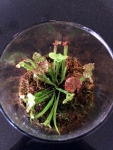
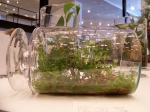
I have three containers here of carnivorous plants. One is just an open round container about 8″-10″ at its widest, one is a cylinder with a glass cover and one is a small terrarium.
No lights, fans or other equipment is needed. Do pay attention to the temperature in the terrarium, they can get quite warm on summer days. It’s usually humid in the house that time of year to leave the lids off.
I was looking for unusual plants that would stay compact for these gardens and decided it was time to grow some carnivorous plants again. It’s been a while since I have done so.
The first two batches died much to my dismay. I had one potted in soil with gravel on top, and one with gravel on the bottom with soil on top. It turns out most potting soil you purchase now has fertilizers in it. Carnivorous plants can’t handle fertilizer.
So I dug around on the net and found out some people were using the same sphagnum moss I use for orchids as a base for carnivorous plants. I’ve also found peat moss works really well.
I soaked the moss and wrung out the excess water. The moss then went into the bottom of each container followed by the plants. Pitcher plants can get tall so use an open container for the taller growing plants. And be sure to plant them under the opening.
Carnivorous plants can sometimes be found in the house plant sections of stores and always be found on line. I’ve had good luck with both. Lately I’ve found eBay to have an excellent selection of plants at great prices.
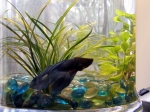
The Houston Garden Club flower show in 2007 had some great underwater designs, yesterday I attended a Woodland’s Garden Club talk on underwater designs, the photos are from both of these.
There were several versions of small water gardens. I’m not sure if its a new trend or something local to this area? I haven’t been living down here long.
These would be great little gardens for a desk or counter top. You might even add a fish.
You can buy these large glass containers cheap now. I see them at Walmart all the time. You can get water plants at any store that sells fish and fish tank supplies.
Things I learned:
– Round clear glass is best
– A design takes a complete thought and moves your eyes through it, while an arrangement is just pretty
– The water line is part of the design
– Oranges from Florida are dyed and will leak the dye into your water, California oranges are not dyed.
– Water magnifies every thing, use that to enhance your design
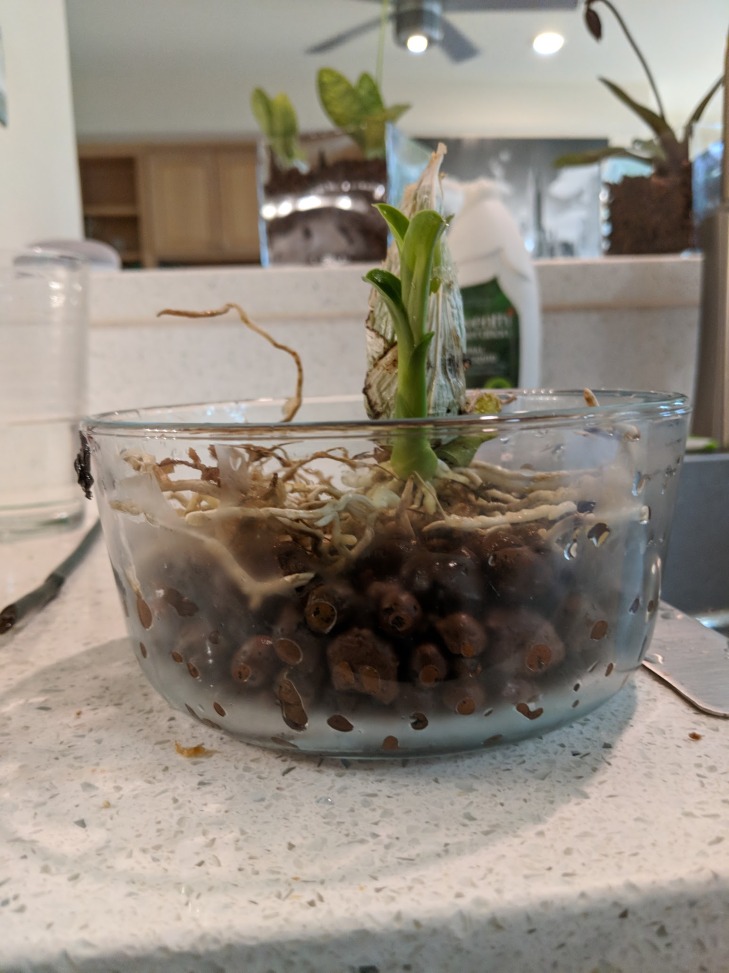
New orchid potted in glass, see the roots are about an inch off the bottomNew orchid potted in glass, see the roots are about an inch off the bottomNew orchid potted in glass, see the roots are about an inch off the bottomNew orchids potted in glass, see the roots are about an inch off the bottom
Growing orchids in glass containers is a nice way to see the plant and the roots. You’ll always know if they are healthy. It also keeps up the humidity around the orchid.
If you have orchids that are young or do not get large you can plant them in large, tall glass containers.
I’ve switched all my orchids over to semi-hydro, I haven’t lost a single one since the switch. I’m using clay pellets, you can find them online by searching for ‘semi-hydro’. I’ve not noticed any difference between brands so go for the best price. Glass pellets or rocks will work just as well. Smoother ones work better than rough ones.
Keep a little water in the bottom of the container. How deep depends on how deep the roots are. I plant them so there’s a half inch of potting medium at the bottom, put the bottom of the orchid roots on that, fill in around the roots with the potting medium and water up to the bottom of the roots. If the roots grow into the water that’s okay. Keep the water level where ever it makes the plant happy, some like deeper water than others.
I find the orchids, especially Phalaenopsis, do not do well in tall glass containers. It is too humid in the tall containers. They do very well in shallow containers, like Pyrex bowls.
If you use a large enough container to hold the entire plant, remove the cover or it’ll be too humid.
About once a year, usually in the winter before they spike I take the plants to the sink, dump them out, wash the pellets and glass and if needed bump the plant up into a larger pot.
If you find you’re watering your plant too frequently it’s time to move it up to a larger pot. What is too frequent mostly depends on how often you are able to water the plant.


You must be logged in to post a comment.